This is my first BBQ Logbook at what is now known as 900 West BBQ. I’m excited to start this culinary journey where I’ll be learning how to make irresistibly good BBQ. Check out my About Me page for more details about this site and my cooking style.
(Click through to what you want to see – I won’t be offended if you don’t read it all)
Table of Contents
- Smoked (Spatchcock) Chicken
- Smoked BBQ Baked Beans
- Smoked Queso
- Smoked (Bacon-Wrapped) Hamburgers
- Coleslaw
Smoked (Spatchcock) Chicken
I’ve smoked whole chickens in the past with decent success, and I’ve roasted many chickens in my oven at home. In this smoke, I wanted to try two things:
1 – develop tasty spice rubs for smoked chicken
Even though I’ve smoked chickens before, I don’t have a specific recipe – I usually just wing it (ha). This is my first time recording a whole smoked chicken recipe. I decided to try two spice rubs, one that has more chili powder and one that has cumin, garlic, onion, and no chili powder. The latter is sort of inspired by Peruvian ‘pollo a la brasa’ which I love, though that style of charcoal chicken is never smoked, to my knowledge. (Spoiler – both turned out great, but could use some modifications, as discussed below).
2 – test spatchcocking to see if it improves smoking time and meat quality
Spatchcocking is easy, quick, makes seasoning a whole chicken easier, and helps the meat cook more evenly. A more even cook helps to avoid drying out larger cuts like the breast. I felt like testing this method to see if I could smoke a chicken a little quicker. (Spoiler – it didn’t help much this time).
Recipe
Ingredients
Spice Rub #1 (used 1/2 for 1 chicken)
- 5.0g ancho chili powder
- 2.5g chipotle chili powder
- 5.0g cumin
- 2.0g coriander
- 5.0g garlic powder
- 5.0g onion powder
- 5.0g salt
- 1.5g black pepper
- 2.0g sweet paprika
- 30.0g dark brown sugar
Spice Rub #2 (enough for 1 chicken)
- 5.0g cumin
- 2.0g coriander
- 4.0g garlic powder
- 2.0g onion powder
- 0.1g oregano
- 6.0g dark brown sugar
- 4.0g salt
- 1.0g black pepper
I used whole roasting chickens, each was ~4.9 lbs. Each chicken was patted dry with paper towels before I removed the spine with kitchen shears and laid them flat. I coated both sides of each bird liberally with BBQ rub.
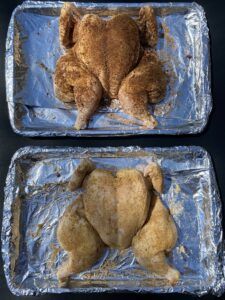
Bottom: Spice Rub #2
Instructions:
Place chickens directly onto the grates of a preheated smoker and smoke @ ~225F until a thermometer in the breast registers 160F. Brush with desired BBQ sauce (or butter) and continue smoking until breast registers 165F. Rest for 30 minutes before serving.
Cooking Log & Notes
I used a mixture of apple and pecan wood chips that I had left soaking since my smoke the previous weekend (7 days). This smoke was done on my Masterbuilt propane cabinet smoker, with a target temperature of 225F as measured by the built-in door thermometer and a probe thermometer I placed near the top of the smoker cabinet. I kept the drip pan filled with plain tap water for the duration of the smoke.
- 12:30pm – smoker turned on, water filled, no chips
- 1:07pm – door = 205F, probe = 230F
- 1:15pm – loaded chickens and wood chips
- 1:25pm – door = 160F, probe = 183F
- 1:35pm – door = 190F, probe = 210F
- 1:59pm – door = 210F, probe = 228F
- 2:36pm – door = 210F, probe = 230F, chicken = 123F
- refilled wood chips
- 3:25pm – door = 215F, probe = 235F, chicken = 136F
- 4:00pm – door = 215F, probe = 237F, chicken = 141F
- 4:30pm – door = 215F, probe = 237F, chicken = 143F
- refilled wood chips
- 3 temp drops for food exchange between 4:30-6:22
- 6:22pm – door = 235F, probe = 221F, chicken = 152F
- 7:00pm – brushed birds
- BBQ #1 brushed with Montgomery Inn BBQ Sauce
- BBQ #2 brushed with melted butter
- 7:20pm – chicken = 154F
- 8:00pm – chicken = 160F
- Finished in 350F oven for 25 minutes to reach 165F internal temperature
Notes
These chickens took forever to cook, and I’m not totally sure why. I had to open the smoker repeatedly to shuffle other items from the day’s smoke, but the cabinet didn’t seem to take very long to come back to temperature each time. Despite reading a ~225F temp the whole time, it took more than 7 hours to cook these chickens, when I expected it to take maybe 5 hours. It’s even more surprising since I spatchcocked these chickens to try and get them to cook faster. That clearly wasn’t the outcome this time…
Here are my thoughts for next time, to help improve cook time:
- Increase smoker temp to a target of 250F-275F
- Reduce door opening frequency and time
- Use a new thermometer probe
- Place chickens on the higher racks (hotter near the top)
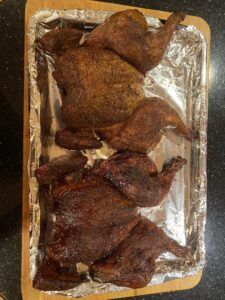
Bottom: BBQ Rub #1
These chickens tasted good, but not amazing. Because of the long cook time, the breast was slightly dry but still tasty. The skin on these chickens became tough by the end – there was a delicious seasoned crust, but it was rather chewy. This can be overcome by slicing the skin thinly when serving, but that’s not ideal. I get a better skin texture on oven-roasted chickens.
Overall, my (family) audience preferred BBQ Rub #2, which was surprising to me since it was comparatively simple and didn’t actually use BBQ sauce at the end – only butter. Personally, I liked the taste of both chickens equally.
The next time I smoke a whole chicken I won’t change the rub but will instead focus on improving the meat cooking technique.
Alternatively, I may stick to roasting whole chickens in the oven, and opt for whole chicken wings or legs in the smoker. I think that smoking smaller cuts of chicken will make cooking easier, help keep the skin from turning into leather, and will still impart plenty of smoke flavor.
Smoked BBQ Baked Beans
This recipe is based on a great smoked baked beans recipe from Hey Grill Hey that you can find here. I love throwing this recipe together because it’s easy, quick, and always a huge hit. The measurements in the recipe below are approximately what I used, but I didn’t measure everything exactly for this recipe – and it usually still turns out great.
Recipe
Ingredients:
- 3 x 28oz cans of Bush’s baked beans,
- 3 tbsp dijon mustard
- 1/4 cup packed dark brown sugar
- 1/4 cup molasses
- 1 medium yellow onion, diced
- 1/4 cup BBQ sauce (Montgomery Inn)
- 1 tbsp BBQ Spice Rub #1
- Salt and Pepper
- 5 pieces of bacon, sliced into squares
Instructions:
In a large bowl, thoroughly mix all ingredients except bacon. Pour mixture into a disposable aluminum serving tray and top with sliced bacon.
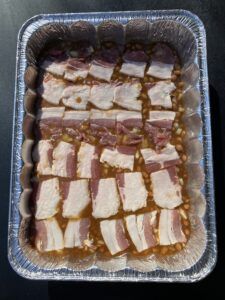
Cooking Log & Notes
See above for details about this smoke. Briefly, I used apple and pecan wood chips with a target smoker temp of 225F.
- 4:30pm – beans in, door = 215F, probe = 237F
- 2-3 short door openings in the interim
- 6:22pm – beans out, door = 235F, probe = 221F
Notes
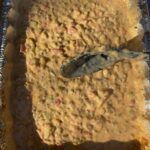
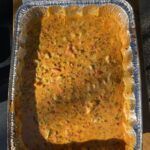
These beans were really fantastic. “Stick to the top of your mouth good”, according to my dad. 2 hours was the right about of time to impart good smoke flavor without overdoing it, and the bacon rendered nicely. The last time I made these beans I added too much onion and forgot molasses, which made them watery. This time I used a bit less onion and remembered molasses and everything was spot on.
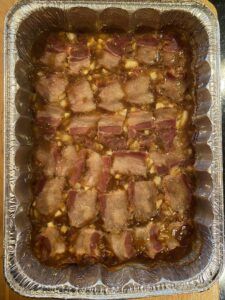
I don’t plan on making any changes to this recipe, aside from making sure these measurements are dialed in at some point (I really just throw it together every time).
One day I’ll probably soak my own beans and cook them from scratch, but until then, this recipe is a keeper!
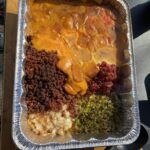
Smoked Queso
This recipe I first saw in the r/smoking subreddit and knew instantly that I had to try it. This is the version that I use, but additions and subtractions are easy to implement. It was, predictably, incredible.
Recipe
Ingredients:
- 2 lbs Velveeta cheese
- 1 lb sharp cheddar cheese
- 2 lbs spicy sausage (Bob Evans, Zesty)
- 1 medium onion, diced
- 1 green bell pepper, diced
- 2 jalapenos, seeded and minced
- 28oz can of whole tomatoes, diced
- This normally calls for 2x15oz cans of diced or Ro-tel tomatoes, but I had this on hand and it worked very well
- 1 tbsp BBQ Spice Rub #1
Instructions:
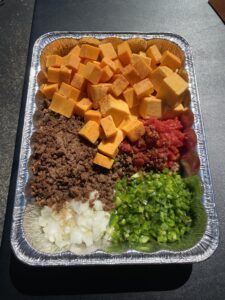
Brown sausage in a pan on high heat until crispy. Place sausage and remaining ingredients in a large disposable aluminum serving tray. Leave ingredients in separate piles to maximize exposed surface to smoke. Smoke at ~225F for 2 hours. Mix and return to smoker for 30 minutes. Enjoy.
Cooking Log & Notes
See above for details about this smoke. Briefly, I used apple and pecan wood chips with a target smoker temp of 225F.
Notes:
What can I say, this was amazing. Crowd pleaser 100%. I have very few notes.
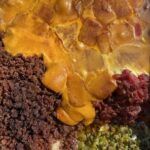
I like to leave the ingredients in separate piles in the pan, and here’s why: maximum smoke flavor. Using chopped ingredients means more surface area is contacted by smoke, and more smoky flavor is imparted. If I were to mix all the piles in with the cheese, the ingredients would slowly submerge as the cheese melts, hiding them from any additional smoke. Maybe this makes a difference, and maybe it doesn’t (I will have to do a side-by-side test one day).
For now, it looks cool and tastes amazing, so I’m gonna keep doing it this way.
Smoked (Bacon-Wrapped) Hamburgers
I’ve always wanted to try a smoked hamburger. I learned a lot in this smoke, my first time smoking ground beef. I think my next attempt will be even more delicious…
Recipe
Ingredients:
- 2 lbs 80% lean ground beef (chuck)
- 1 lb bacon
- salt and pepper (fresh ground)
Instructions:
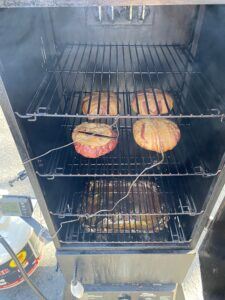
Form patties ~1/2 pound thick. Wrap each patty with 4 pieces of bacon. Smoke at ~225F until you reach the desired internal temp (165F = cooked).
Cooking Log & Notes
I used apple and pecan wood chips with a target smoker temp of 250F. This smoke was done on my Masterbuilt propane cabinet smoker.
- Preheated smoker to 200F
- 4:10pm – burgers on, wood chips in
- 4:55pm – smoker probe temp = 228F, door = 210F, smoke quality great
- 5:30pm – burgers = 141F
- 5:47pm – burgers = 152F
- 6:00pm – burgers = 159F, took off
Notes
This was an interesting experiment and I learned a lot. I was worried that cooking ground beef for 2 hours (or up to well done) would dry it out – boy was I wrong! These burgers were a juicy mess.
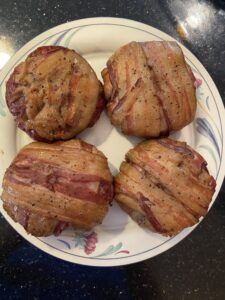
The bacon wasn’t crispy, it was kind of chewy. This recipe would be improved by crisping the smoked bacon in a pan after cooking or omit the bacon altogether.
I pulled these burgers at 159F, which is close to well done. Next time I will let them go all the way to 165F – that way I don’t have to worry about undercooked beef. I’m no longer worried about them drying out..
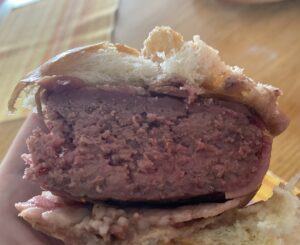
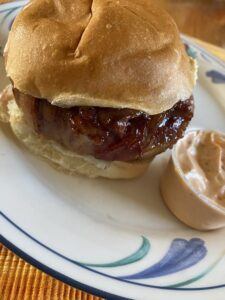
These burgers were beefy, next time I will try 1/4 or 1/3 pound patties instead of 1/2 pound like I used this time. They were a little unwieldy to eat, and I think that a smaller patty will still retain juiciness after a long smoke.
Coleslaw
I like to make coleslaw just about every time I BBQ. It’s time to start honing in on the perfect coleslaw recipe, so this time I measured every ingredient exactly.
Recipe
Ingredients:
- 700g Cabbage, shredded (3mm thickness)
- 80g Carrot, grated on the large holes of a box grater
- Dressing:
- 100g Mayonnaise
- 50g Sour cream
- 10g Lemon juice
- 1/4 tsp onion powder
- 1/4 tsp garlic powder
- 1/2 tsp celery seed
- 1/2 tsp dijon mustard
- 4 tsp Splenda
- Salt/Pepper to taste
Instructions:
Shred cabbage on a mandolin set to 3mm thickness. Toss shredded cabbage with grated carrot. Mix together dressing and season to taste (it should be slightly salty/tangy, which will be diluted by the cabbage mix…). Toss dressing and cabbage in a large bowl. Cover with plastic wrap and refrigerate for at least 2 hours before serving.
Cooking Log & Notes
I mixed the ingredients listed above. For a couple things I did measurements instead of using the fine scale balance.
Notes
This was not a great batch of coleslaw, but I have some ideas.
The dressing was thin, too scarce, and lacked zing. Next time – increase mayonnaise, lemon juice, onion powder, and dijon.
The cabbage had some larger pieces in it even though I used a mandolin. Next time – better cabbage quality control during slicing. But 3mm was a great width overall.
Final Thoughts
This was a great weekend smoke. I learned a lot, tried some new things, and finally started recording my recipes. Hopefully next week will see some improvements in flavor and technique!
